Pages

Thursday, November 28, 2013

How to Create Your Own Teeswater Cowl

Many knitters have asked me how I created my beautiful Teeswater cowl I posted in my Dawning Dreams group on Facebook. So I decided to write it down for you. I want to warn you though, this is not truly a pattern. I'm not out to give you every last detail to how I made mine because it was an invention of the imagination and the fibers. The yarn is my handspun from my friends sheep. It is a one-of-a-kind in an of itself. So, to tell you to use this or that yarn would be like trying to repaint a famous work of art. Don't let that turn you off, however. Instead, look at this as an opportunity to create your own "work of art" using your knowledge and skills. So, if I haven't scared you off by now, let's begin.


Materials:
  • ~200 yards of a thick and thin spun, super bulky single (My handspun for the body  was Oklahoma-grown Rambouillet fiber from Lowder Colours Farm.)
  • 4-8 oz of long, (~6-7") Teeswater wool locks (other varieties of locks could include mohair, Wensleydale, or Suri alpaca to name a few.) 
  • Size 15 Circular Knitting needles (mine are Denise Interchangeables)

Methods Employed:
  1. The yarn is a thick and thin single, as I said before. The thickest parts are about the width of my thumb. If you don't know how to spin thick and thin check out Jacey Boggs Sit and Spin! DVD.
 

2. The Teeswater locks were about 6-7' long and slightly felted on the cut ends. I purchased mine from Lowder Colours Farm right here in Oklahoma. This is important! The slightly felted ends allowed my to create a hole, that you will see to add as fringe. The following images show you how to create the hole.


Once you have all your supplies gathered, we're now onto the "pattern" part.
  1. Cast on 70 stitches on the size 15 circular knitting needles. Side note here: If you don't like it as large around the neck, decrease the amount of cast on stitches. Keep in mind. though, you will have to increase to get back to the needed number later to get around your shoulders.
  2. Join beginning and end to form circle.  Don't twist the stitches!
  3. Work four (4) rounds in purl stitch. This will creating a Stockinette that will roll the collar. 
  4. Now, work (2) rounds in knit stitch. This will create a division between this and the next bump.
  5. Work (4) more rounds in purl stitch. 
  6. Work 10 rounds of knit stitches. 
  7. Increases begin here; make an increase every 7 sts all around. I used Make One Front as seen in the Knitting Help video collection at http://www.knittinghelp.com/videos/increases. This will increase your overall number by 10 sts (80 sts)
  8. Knit (5) more rounds. 
  9.  Increases begin here, make an increase every 8 sts all around. This will increase your overall number by 10 sts (90 sts)
  10. Knit (2) rows. 
  11. Now for the shaping... and insertion of locks
  12. We're going to bind off (15) stitches now, but at the same time add locks for the fringe. Using the method above for creating a hole in the tail end of a lock, you will add a lock into the needle before binding off the stitch. As you knit the stitch, you will pull the lock and yarn through as one. It's kind of like thrumming. If you don't know how to do this, check out on the Daily Knitting video at http://www.youtube.com/watch?v=YeCIghU9gT0. Instead of folding the roving, you'll just add the end through and leave the beautiful tip hanging. 
  13. Here's the tricky part because I did not know how much yarn I had so I decided to go until I had enough to bind of. With what I had left, it created a gentle curve, but if you had a lot much yarn, it would eventually come to a point.
  14. From now on, until you run out of yarn, you will bind off (1) one stitch at the beginning and end of each row while adding a lock or two each time. Your method may be different than mine, but I simply K2Tog (knit two together) on the knit rows, and P2Tog (purl two together) on the purl rows.The more locks you add, the fluffier it'll be, but it will also be harder to knit. Find what's comfortable for you. 
  15. Keep up this pattern until you have just enough yarn to bind off. (I made another 15 rounds before needing to bind off.) Bind off remainder stitches as mentioned in number 12 above. 
  16. Weave in any ends.
The finished product should have a nice gentle asymmetrical curve from the thinner part to the bottom. This gives you flexibility on wearing it.

If you like this or any other DIY tutorials, feel free to donate directly to me using the link below. I truly appreciate anything you can offer to keep me creating. 


Monday, July 29, 2013

Fiber Christmas in July 2013

Oh, what a weekend! As one of the organizers behind Fiber Christmas, I take much pride in offering small fiber businesses a place to come together once a year in a relaxed and supportive environment. Our goal is to connect those who have a fashion for fibers arts whether that be knitting and crochet, spinning and weaving, or even felting. Though each is its own category, there is an invisible connection between them all in which techniques can cross genres. For example, knitters can use certain crochet techniques to finish the edges of objects, or a weaver can change the look of a woven fabric by understanding the bias of the active twist of a yarn when woven.

The being said, many times a person does not realize that these techniques and tools can be intermixed. This is where a fiber festival like Fiber Christmas steps in. It brings together the different types of fiber arts to share knowledge, tools, and supplies in one location. The joyous part of Fiber Christmas is that the vendors are like a family. We each have our own strengths and weaknesses and will gladly point you in the right direction when you're looking for something specific. By supporting each other, we can a strong and active community filled with continued growth and respect.

So, what does that mean for those who visit? They become incorporated in our fiber family. They learn through exposure to some of the best artists we can bring in. They are able to purchase things they would normally never see in person. With this added value, I see returning friends year after year with new and exciting projects and ideas that expand our ideas.

Some photo highlights for you all.


Saturday, April 27, 2013

Yellow Rose Fiber Fiesta 2013

Oh Yellow Rose! How much I enjoy thee, Yellow Rose. This has quickly become one of my favorite fiber fairs to attend. The location, the people, the fiber... It all works together for a delightful weekend of mayhem.

First off, my drive time was right about 7 hours from where I am in Oklahoma to Seguin, TX. Ironically, I've gotten pretty good at driving long distances alone. One of my favorite techniques to keep me going an mentally shorten the trip is to listen to an audiobook on the road. This time. I had Across the Universe downloaded from my local library. This sci-fi romance set many years in the future had a lot of twists and turns that kept my interest. I actually started with another book, but it couldn't hold my interest. It would be also a great time to listen and catch up on your favorite Podcasts if you listen to any. (*cough, cough* Must Stash Podcast )

Lucky for me, my Fiber Party Friends already were checked into the hotel and I simply pulled into the parking lot and walked into my friends waiting hugs. The best welcome ever!

Saturday morning, I spent setting up my new shelves for display. Let me tell you, I love my new shelves. They are light, easy to travel, and put up in a cinch. It took me all of an hour to get everything up for display with help from my friend Laurel of Spinatude.

And finally everyone started arriving!!

I had so many wonderful conversations with such a variety of people. For instance, one kind woman showed me photos of her various weavings that she created. Another lovely family actually had just returned from my childhood home in Okinawa, Japan. Their children were darlings! They even took the drop spindle class. I also got to chat with Stacie of the Must Stash Podcast. Laura aka lala of The Knit Girllls on Ravelry made an appearance as well! It's always a pleasure to see her smiling face.

There were so many wonderful vendors of various backgrounds. I spent much of my time chatting up with my new friend and booth neighbor Angela of Purl & Loop.  She had the cutest needle felt kits. You should go over and see.

 Now for more photos!! Check out all the yummies you missed if you weren't able to make it...


Laurel had a blast taking photos with her awesome camera. She got some really neato' ones of my treasures.


 And finally, what would going to Texas be without my Fiber Party Friends Andrea, Laurel, and Emily. They make it so much fun to work. As you can see, there are always plenty of hugs and laughs to share when we are together.


As for goodies for myself. Well, I didn't go overboard, but I returned with fiber, yarns, and a special sheepy necklace. The batts are from my fellow talented batt maker Butterfly Girl Designs. The super soft yarn is from BuenaSuerte. and I'm not sure who made the necklace. It was a true impulse buy on my part.


Whelp, that's it. I packed it all up on Sunday and spent way to many hours back on the road to Oklahoma. Thank you all! I hope you enjoyed the show. I'll see everyone again next year!

Sunday, March 24, 2013

DIY Blending Board for Fiber (lots of photos)


With a plethora of fiber tools out there, I try to save money any way I can by making things myself. In many ways, I feel like I am the antithesis of today's use-it-and-throw-it-away mentality. I love to reuse things in new ways to make them useful again.

With many tools, I have no problem purchasing them straight from manufactures like spinning wheels and drum carders. However, I love to make the simple tools myself. I have a number of handmade crochet hooks, knitting needles, spindles, and so on. You don't think women of the 1800s ran off to Walmart to buy a set of knitting needles, do you?

I already have a DIY Triangle Loom tutorial. Recently, I decided to buy a blending board to take on the road. My drum carders range from 10 to 60 lbs. No way am I hauling those bulky, babies around while trying to keep them (and me!) safe.

After looking around through the various blending boards offered from Clemes & Clemes, Howard Brush, and Etsy. I decided the $160-$250 price tag just wasn't for me. So I decided to go the DIY route and make my own.

SUPPLIES:
1 ea - 12" 72 TPI blending Carding Cloth from Natural Fiber Yarns on Etsy ($65)
1 ea - 15" x 22" cutting board from Walmart ($17)
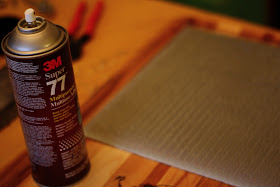
1 ea - can of 3M Super 77 spray on glue from Walmart ($7)
1 ea - medium grit sandpaper ($3) had on hand
7 dozen - 1/2" staples for my air compressor nail gun had on hand ($3)
Polyurethane spray can had on hand
1 image for transfer (optional)
1 sheet of fabric transfer paper (optional) had on hand
1 - DIY attitude

 EQUIPMENT:
Air compressor with nail gun
Iron (optional)
Computer with Inkjet Printer (optional)

STEP 1:
Sand lightly over entire board. This allows for better bonding with the glue. I choose a larger heavier board, so when I lay it on a table, it doesn't scoot around much. You can have a smaller one of you want or even buy more carding cloth to cover more of the board. It's your choice.


Optional Image Transfer :

 Print the image you want to transfer onto the special Iron Paper by following the instructions provided with the packaging. A couple of notes on this... Make sure you do not buy the type with either the white or black background. It should be clear. Otherwise, you will have a white block around your image. Also, the transfer is not 100% and has an aged look to it. I choose an image that is all black and simpler in design because I knew this would happen. You can look up other ways to transfer images to wood, but I had these supplies on hand, so it didn't cost me anything.

I cut around the edge of the image and placed it on the board where I wanted it. With my iron on the "Cotton" setting, I heated up the image until I could easily peel away the backing and all the ink was transferred to the board.


I repeated this again on the back side with a larger image, so that I have one on the front and one on the back. After cooling, I sanded to left over glue residue around the images off.


STEP 2:

Now, for the carding cloth.  You have to prepare the cloth before stapling it onto the board. when it is created and cut, they do not remove the staples on the front and back cut edges. You have to pull a row or two out beforehand to give your staples enough room to fit. I used a metal nail file to take these out. It's really quite simple and only takes about 10 minutes to get done.


See, now there is a nice pile of dead staples.


I placed my cloth on the upper portion on my board. When you add fiber to the work area, it will hang off the bottom a bit. I rationalized that I should leave some room on the lower edge for this. 

STEP 3:

Now, it's time to glue. Read and follow directions on the can. I sprayed the back of the cloth and the board itself. (1/18/14 NOTE: I have recently been informed that gluing the entire clothe to the board has been know to disrupt the stability of the tines. If this is an issue for you, please only glue the edges of the clothe down, not the entire surface. I have not had any issues, but it may be better to be safe than sorry.) When they were both tacky, I placed them together for an initial bond and then set a flat medium weight box to add some pressure for better bond. You have to be careful to put enough weight over the entire area to firm hold it together, but not too much to bend the staples. I let this dry overnight. 


STEP 4:

The next day, I pulled out my air compressor and staple gun. Using the 1/2 " staples, since these would not go all the way through the board, I stapled around the edge of the carding cloth, spacing the staples 1" apart. The glue will keep the cloth from shifting and the staples will keep it secure. Remember, this is a tool, we want to to last and only doing glue or stapling is not good in the long run.  


STEP 5:

I lightly sprayed a polyurethane coat over the exposed wood parts while cover the carding cloth to make sure it didn't get any on it. This seals the wood and protects the images from damage. 

STEP 6:

Enjoy your new handmade board! I'm not going to go into how to use it in this blogpost. I think you should just play in to beginning and see what happens. It will not replace my drum carder, but its a great tool that I can take to fiber festivals and on the road.

Also, the cutting board I purchased has these wonderful groves around the edges which work great for placing my dowel rods in so they don't roll away. The only thing I wish it has is a handle and maybe a brace underneath to hold it in my lap like some of the more expensive ones. That's okay though. If you have the tool and gumption, I'm sure you all could do it to your own boards. I sure am happy with the way mine is.


 TOTAL COST: ~$90 since I had some of the things on hand. That's $70 cheaper than the least expensive board online. Actual time I spent on the piece (-drying time) 30 minutes. It's kind of like cooking, if your willing to put some time into it, you can save yourself some money by buying the ingredients and making it yourself.

If you like this or any other DIY tutorials, feel free to donate directly to me using the link below. I truly appreciate anything you can offer to keep me creating.