Wednesday, January 11, 2012

Shawl Display Via Pinterest

I figured since I work and live at home, I can make it a bit more inspiration and joyful to be in. I'm under a strict monetary limit however. I never buy full retail and often make things myself. This is the story of one of those projects.

First off, I saw this image of hanging shawls.  I have a lot of shawls. Getting them out of the closet and displayed has been on my list for some time. It was simple, too simple for my style, but it inspired me to try something similar.


I have this wonderful antique store in my town. It's filled to the rafters with awesome and reasonably priced treasures just begging to be sifted through. If you're OCD or claustrophobic, you wouldn't be able to handle it. There is not much rhyme or reason to the layout, which makes it great. I always find something new and interesting when I visit, from antique hats and gloves, to old tools, jewelry, dishes, and more! This time I went in with a mission, to find something appropriate to display my handspun and handknit shawls.


After perusing for near an hour. I found a simple piece of wood that had white knobs on it. It wasn't fancy, but since it was ready to hang and had the holes in it, it was a perfect start. It was really funny because when I asked the owner about it, she said she just purchased it for the knobs. Well, since I didn't want the knobs, I took them off  and gave them to her. Then, going back to the far end of the shop, I found a shelf full of old mix and match dresser pulls. After getting an assortment together, I asked her how much she wanted for the knobs and wood. For 20 knobs, I paid $12 and she threw in the wood for free since she didn't want it in the first place. I said she was reasonable right? The white ones were the original knobs that I couldn't remove at the shop. I figured they added to the allure anyway, so I left them.


This has become a favorite place of mine to look at. I forgotten just how much work I've done and what I've accomplished with my craft. It's great to look there and remind myself every once in a while.

Friday, January 6, 2012

A Look at Fiber Festival Preparations and Booth Design


This month I wanted to give you all an inside look at what happens at my homebase before a fiber festival. I do not simply load up the car and head out. I wish it were that simple. With a majority of my income from face-to-face sells, I put a lot of thought behind every detail, from what inventory to bring, to how to set-up my displays and even tagging everything.

Having participated in many festivals now, I have a better idea of what works well for me and what doesn't. However, no two festivals are the same. The people visiting aren't the same. What I have in stock isn't the same. You get the picture. Besides, if I went to various fiber festivals and saw the same set-up and inventory every time from a vendor, I probably wouldn't keep visiting them because I would already know what they have and if I were interested. Now, that's not to say there is a certain stock that I take every time like batts and roving. I just like to add something new to tempt you. 

For example, at my next Fiber Festival, Arkansas Fiberarts Extravaganza in December, I plan to bring hand-dyed silks and my new drop spindles. On one hand, I'm delighted to bring them because I am so proud of getting these finally out for sale. I've been working on the drop spindle designs for nearly a year now, testing weights, hook shapes, shafts, etc. . . To finally be able to put them in spinners hands will be rewarding. On the other hand, that means I need to figure out a way to display them in a booth that's attractive and accessible.

To begin with I start brain storming. In previous years, I have displayed drop spindles by hanging them on a tree of sorts. You can see it in the example below of my booth at Mid-Ohio Fiber Festival. It worked out well for my inexpensive beginner drop spindles. However, it took up a lot of space within the small 8X8 feet booth.


So off to the drawing board. I usually start off with a pen and paper (or pencil in my case). I take the space I'm given and create a square. One inch equals one foot in my models. It's really easy to measure everything else out then. Here's an example of my latest layouts. I know I'm going to have a table and a chair, plus some of my other displays. So I take those big items and start placing them within the space. Let me tell you, it's a lot easier than pulling out a table and moving it around.

Once I get an idea of what will work, that's when I make a Mock booth set-up. I usually do it in my dining room since it is the easiest to remove everything and it's large enough to accommodate all sizes of booths.

You also have to keep in mind that these items have to be able to fit in a car. I personally only have a 2002 Saturn. It's a midsized car with good trunk space. I don't own a trailer and I don't want to waste money on a U-Haul. Therefor, everything must be able to fit in the car. Knowing this, I try to make everything I use for display very portable and able to break down into small bundles. While attractive wooden shelves are nice, I personally want people to see my products not the shelves. Besides, if my displays get in the way of the amount of fiber I bring, that's money lost.

I use a wire shelving system that many vendors use. They are wonderful because they can be put together in numerous ways to suit your needs. They are very portable and inexpensive comparably. I know many vendors that use Grid Walls as well, but they don't fit comfortably in my car (or I would use these babies!). So when I looked at displaying the spindles, I tried using the things I already had on hand. 


First, I placed them in the holes on to see how that looked. Well, You can see the tops of the spindles, but only if they are on that second level. It's not very attractive and I could only get about 25 spindles per level.


Then, I hanged them up on the upper shelves. Well, unless you want to just see the bottom or side of them, this was not a good option. Plus, unhooking one to look at tended to knock the others down. Hmm. . .


 So after contemplating what I learned from the experiments: I want to see the tops, not hang them, and yet not add anymore display gear. I tried this option. I took dowel rods and placed them at an angle so the spindle was tilted towards you. It's easy to set-up, doesn't take a lot of room, the spindles are easy to grab, and you get a great view of the tops. I can also fit a lot of spindles using the vertical space between shelves rather than using a space that can be filled with something else.
This is a winner! 

Now, I'm ready to place products in the shelves. I also write up a diagram for that, too. Here's the beginner layout. It's a diagram of just the table with the shelves. You can see this was before I added the spindles. I try to place things together, like fibers in one section and yarns in another. You have to make the flow smooth from one product to another. No one likes to jump around to find what they want.


At home I can play around with where to put things rather than wasting time at the event. You usually only get a small amount of time to set-up and I'd rather spend it fine tuning display, rather than trying to fix a major catastrophe that could have been avoided.

Another good reason to do a mock booth is that you can count the inventory you plan to bring. It also allows you to repack everything in a compact manner for the upcoming trip. I know that all my fibers tend to get spread out as I create more and sell them online. Having to gather and pack it all gives me the opportunity to do some housecleaning.

So, here is my final booth at Arkansas. I actually had to switch the batts over from the right side of the booth to the left, since more people would see them from that direction. Once again, that was just one of those things the I tweaked based on the environment.


 The vintage ironing table was an excellent table for the register, business cards, and other information. It doesn't take up much room either. See the spindles displayed on the table. It worked beautifully!


I was most excited to see the wall of batts go up.  I usually keep them all organized in buckets. Having them out and displayed was very fulfilling. That's a lot of elbow grease on that wall!

Monday, December 5, 2011

5th Annual Arkansas Fiberarts Extravaganza in Review

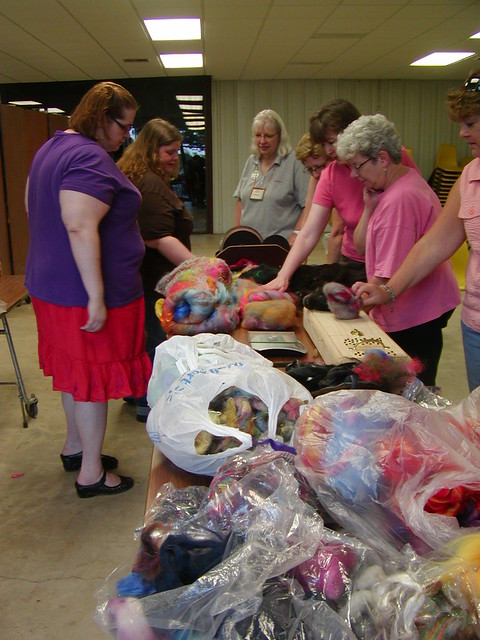
Whew! What a whirlwind weekend at the Arkansas Fiberarts Extravaganza. This year was an entirely new experience as it has been moved to Hot Springs, AR. It was all held in the Convention Center in Horner Hall. It was very nice to have such a roomy space to spread out. With 26 vendors, we really needed it!


We completely took over the Embassy Suites as you can see below.


There were more knitters there this year than in previous ones. Maybe because we had changed locations, who knows? I spent much of my time teaching lots of knitters to spin on a drop spindle. You know, entice them with a new extension hobby. Even if a knitter doesn't want to spin, I think by knowing yarn construction, a knitter will be better able to understand how a yarn will behave. For instance, some knitters find that when they knit a yarn single in continental, it tends to unwind and pull apart. By knowing that it's the twist that holds it together, they may be able to see that the yarn unwinding and is getting unsound and weaker. Then, they can change the way they are knitting to keep the yarn from falling apart.

The knitting contest was a lot of fun to watch. For such a relaxing activity, having them speed it up entertained the heck out of me. Annie Modesitt had entered and won because she really wanted a pair of sassafras earrings. I know the feeling! The fashion show had a wide array of entries from classic shawls and sweaters to works of fiber arts. I saw a really neat nuno felted sari vest that I want to try to make. I just need to get me a sari now.

The Ravelry ice cream party was a hoot! I didn't actually get any of it. The organizers didn't foresee just how many people were going to show up!  Sarah aka onestitchshort
handed out lots of prizes. Near the end, she gave away a lovely bag that I was coveting that had fiber animals all over it. I turned around to tell my friend how I wished I had entered the drawing just to get one of them when Sarah called her name! Color me green with jealousy. I told her to go get Sarah's autograph on the bag. I mean, when else were you going to get an autograph from Sarah?! She did, of course. She deserved such a treat for helping me run the booth all day.
 
Since a picture is worth a thousand words, here are several more I took at the event.  There are also more on my Flickr page if you want to see what else was there.


Tuesday, August 23, 2011

Mid-Ohio Fiber Festival in Review

Hello all! I just got back in from the First Mid-Ohio Fiber Festival in Newark, OH. My mother-in-law and I drove the 17 hour trek to this first time event. Let me just say, there is nothing to see in Indiana along I-64 including gas stations. Make sure to fill up before going through.


 The Reese Center, where the festival took place, was a nice facility. The event organizers even helped us unload and load, which I thought was a lifesaver since I'm usually carrying everything by myself. I really appreciate their hard work in putting this festival together. It was so well done, you would have never thought it was their first year. Great job you all!
  Luckily, I had the absolute joy of sharing space with Elizabeth of Spotted Circus, a fellow Phattie from Indiana. It's always a lot of fun to talk shop with someone in your field and we certianly did that and then some.
Elizabeth raises alpacas and I loved hearing about the animals and adventures of farm living. Her husband designed all the logos, which I thought were fantastic, by the way! She has everything from alpaca roving to handspun, to milk from Moonwood Farms. It's amazing just how we fiber artists are able to put our own spin on our products.

See the logo?! So neat. . .
My own space I filled as much as possible with batts, yarns, fibers, and cards. I wanted an explosion of color, and I think I accomplished that. The big Behemoth Batts were a hit! I think half of them that I had brought are on their way to their new homes. I also fortunately got to meet a lot of people I've only talked to online.


 After festival hours, My mother-in-law, her cousin, and I explored the area. We ate wonderful sushi at on Friday night. My MIL had never eaten sushi before, so it was a real treat to open her eyes to just how delicious it can be when made correctly.

On Saturday night, we had Indian at Bombay Garden Indian Restaurant. It was as authentic as you can get. The cook, a kindly older Indian woman, created the most fantastic dishes. Elizabeth had ordered a Mango Lassi drink that ordered after I saw hers. I simply must obtain a recipe for it as it was the most delicious drink I've had in a while.
 My MIL kept telling us about Longaberer baskets that were in the area. Unfortunately, we didn't arrive during their business hours, but we did take a photograph of the fascinating building. I love interesting architecture and this is something you do not see.


 Well, that's the summary of the fun weekend. It was a long drive and far away from home, but it was worth meeting new friends and seeing new sights. Thank you all that came out and enjoyed the day. I hope to see you all again sometime.


Monday, August 1, 2011

Fiber Christmas in July 2011

I've been working the past two days putting away fibers, washing new fiber, and organizing the mess that came home form Fiber Christmas in July. It was an absolutely wonderful weekend.

P7300076

On Friday, I drove up to Kellyville since I help with the event. We spent the evening laying out tables and chairs in their spots, which isn't easy since those 12' table weigh a ton. Luckily, with all the extra help it went along quickly and we were out by 9.

 P7300096

On Friday morning, vendors starting arriving. It was lovely to see my fiber friends from out of state like Brenda and Mike of Wooden Spinner, Natasha of Gritty Knits, Dominique of Morandia, & Lori of SarahKate Fibers. We spent the whole morning chatting while setting up and checking out the goodies before the crowd arrived. That good thing about Friday is that it's less busy, so we get time to talk with our customers, which I like. A lot of them make it a point to come on Friday to visit, then come back on Saturday to actually shop.

On Saturday, after a goods nights sleep, I spent the day showing newbies how to use a drop spindle, several people how to spin silk caps, and general trouble shooting questions. I loved seeing all the goodies everyone showed me before leaving. While I want customer to buy from my store, I have absolutely no hard feelings when they buy elsewhere. I am not the only great Fiber Artist out there and we all over something unique and different. The buffalo fiber and yarn was to die for, and I was lucky enough to win the Most Creative category in the Christmas Ornament contest which earned me to hanks of Lux buffalo blend yarn!

P7300134

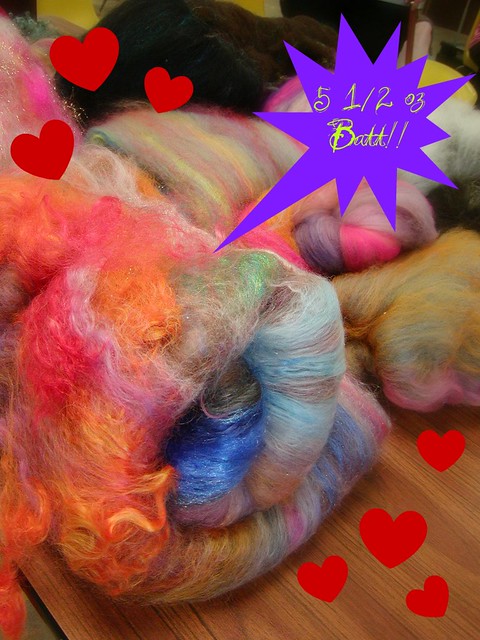
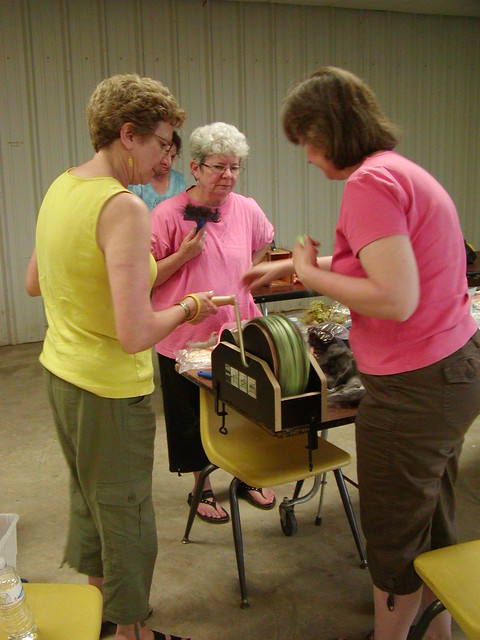
In the evening, I had the pleasure to teach a wonderful group of women some of my tips and techniques in drum carding. We had new carders and experienced alike, which lead to some most unusual batts. We were all giggling and carding like crazy trying out different fibers and carders. Brenda brought her double wide Mad Batt'r carder to play with and like me have the pleasure to try out. Of the two batts we got off, the first one weighed in at 7.75 oz and the second was 5.5 oz. I loved it so much, I've ordered one with the proceeds from the class. Thank you all! I wouldn't have been able to afford one of these babies without them. Fiber Artists can be the most genuine and fun people around.
Mega Batt


P7300119

After packing up I helped Kate and her husband of Lowder Colours Farms herd some sheep to be taken to market. I'm definitely not a wuss about getting dirty, which I illustrated since the only shoes I had on my were my wedge heels. It was comical herding them into the trailer. I had to hose the shoes and wash them once I got home, but I wouldn't have missed the opportunity for anything. Everyday life for a shepherdess, once in a blue moon for me. What I do wouldn't be possible without them.


There are, of course more photos available to see of the event on the Fiber Christmas in July Flickr group if you want to see more of the fun we had.

Thursday, July 21, 2011

Solar Dyeing Silk


It's one of those days, as it has been for the past month, that the blazing hot sun heats to concrete making shoes necessary just to check the mail since it will blister your soles. With 104 degree temperatures every day, I have to do all I can to keep the house at a cool 78 degrees. I have all the windows drawn with blinds and curtains. Lights off, and no extra cooking. It's sad when a cold shower sounds refreshing.

So with all this heat, I decided to dye up some silk caps I just got in the mail. What more can I ask for? Silk. . check. Dye. . . check. Heat source. . . quadruple check. I know a lot of artists get the big pots out with thermometers to check the right temperature. As an Artist, however, I'm not inclined to do things too scientifically. Yes, I have a degree based in science. You wouldn't believe how many chemical structures come to mind when I think of alcohol alone. I always loved to figure out how things work.

However, I am a emotional being. I am creative. I refuse to let my job become just that. I don't want to "burn out" as many do. I am a Fiber Artist by choice. I wish I could say I make a ton of money and travel the nation in luxury. Truthfully, my earnings go right back into the business. I buy supplies, pay for advertising, rent booths, pay taxes; all things you must do to run a business. It's not always fun, but it's mine.


That being said, I went around gathering supplies; food jars, silk, dyes, etc. . . As I filled my first jar with dye and water, a funny sound sputtered from the sink. Oh no! There's wasn't any water. After checking the news, I found that a water main had ruptured. Boo, I had jars with dye laid out to fill. So, I took a break and hop onto the computer to wait it out. Lo and behold, Ester of Jazzy Turtle Creations is working on the same thing! You can check out her blog at http://jazzturtle.com/2011/07/21/solar-dyeing-with-summer-heat/ on solar dyeing. It was nice to see that I'm not the only one with this idea today, in the blazes of summer. It's as though, through all this, there was some camaraderie between the Fiber Artists.


Eventually, the water returned; the jars filled and laid out. So there they sit, cooking in the sun. I went out to take some pictures and burned my knees kneeling on the ground. Split seconds have given my 2nd degree burns. Yowzers! That's hot! I took a couple of good shots before having to return to my air conditioned haven.

So enjoy the process, have a smile on me. It's the simple beauty of solar dyeing that keeps me chugging on.

Thursday, May 5, 2011

Spinning Batts Video including a Spinning Cuff Pattern

Spinning batts are a joy! I've been spinning several years now, and it amazes me how many spinners avoid batts because they are intimidated by them. Instead of writing it all down, I've created a video to show you. Enjoy!

Here's a simple pattern for a wrist cuff made using some scrap superbulky handspun yarn. It's best to use something soft and with a lot of texture, so that when you wrap you roving around your wrist, it doesn't slide around and fall off.


SIZE
One Size

FINISHED MEASUREMENTS
Height: 4 inches
Circumference: 8 inches

MATERIALS
~10 yards Superbulky Handspun
1 set US size 13 circular needles
Crochet Hook to weave in ends


PATTERN

CO 22 sts
Join to knit in the round, place marker at beginning of round
Knit 8 rounds
On next round, K1, K2tog, Knit to end of round.
Knit 4 more round.
On next round, K10, K2tog, Knit to end of round.
Knit 2 more rounds.
Bind off loosely and weave in tails.


Copyright 2011. Dawn L.E. Riden. These patterns are for personal and non-profit use only. You may not sell items made from these patterns. You may make them for yourself, as gifts, or for donation to charity sales or auctions. And these patterns love being used for knitalongs or other organized knitting events that are free of charge.