Showing posts with label yarn. Show all posts

Thursday, November 28, 2013

How to Create Your Own Teeswater Cowl

Many knitters have asked me how I created my beautiful Teeswater cowl I posted in my Dawning Dreams group on Facebook. So I decided to write it down for you. I want to warn you though, this is not truly a pattern. I'm not out to give you every last detail to how I made mine because it was an invention of the imagination and the fibers. The yarn is my handspun from my friends sheep. It is a one-of-a-kind in an of itself. So, to tell you to use this or that yarn would be like trying to repaint a famous work of art. Don't let that turn you off, however. Instead, look at this as an opportunity to create your own "work of art" using your knowledge and skills. So, if I haven't scared you off by now, let's begin.


Materials:
  • ~200 yards of a thick and thin spun, super bulky single (My handspun for the body  was Oklahoma-grown Rambouillet fiber from Lowder Colours Farm.)
  • 4-8 oz of long, (~6-7") Teeswater wool locks (other varieties of locks could include mohair, Wensleydale, or Suri alpaca to name a few.) 
  • Size 15 Circular Knitting needles (mine are Denise Interchangeables)

Methods Employed:
  1. The yarn is a thick and thin single, as I said before. The thickest parts are about the width of my thumb. If you don't know how to spin thick and thin check out Jacey Boggs Sit and Spin! DVD.
 

2. The Teeswater locks were about 6-7' long and slightly felted on the cut ends. I purchased mine from Lowder Colours Farm right here in Oklahoma. This is important! The slightly felted ends allowed my to create a hole, that you will see to add as fringe. The following images show you how to create the hole.


Once you have all your supplies gathered, we're now onto the "pattern" part.
  1. Cast on 70 stitches on the size 15 circular knitting needles. Side note here: If you don't like it as large around the neck, decrease the amount of cast on stitches. Keep in mind. though, you will have to increase to get back to the needed number later to get around your shoulders.
  2. Join beginning and end to form circle.  Don't twist the stitches!
  3. Work four (4) rounds in purl stitch. This will creating a Stockinette that will roll the collar. 
  4. Now, work (2) rounds in knit stitch. This will create a division between this and the next bump.
  5. Work (4) more rounds in purl stitch. 
  6. Work 10 rounds of knit stitches. 
  7. Increases begin here; make an increase every 7 sts all around. I used Make One Front as seen in the Knitting Help video collection at http://www.knittinghelp.com/videos/increases. This will increase your overall number by 10 sts (80 sts)
  8. Knit (5) more rounds. 
  9.  Increases begin here, make an increase every 8 sts all around. This will increase your overall number by 10 sts (90 sts)
  10. Knit (2) rows. 
  11. Now for the shaping... and insertion of locks
  12. We're going to bind off (15) stitches now, but at the same time add locks for the fringe. Using the method above for creating a hole in the tail end of a lock, you will add a lock into the needle before binding off the stitch. As you knit the stitch, you will pull the lock and yarn through as one. It's kind of like thrumming. If you don't know how to do this, check out on the Daily Knitting video at http://www.youtube.com/watch?v=YeCIghU9gT0. Instead of folding the roving, you'll just add the end through and leave the beautiful tip hanging. 
  13. Here's the tricky part because I did not know how much yarn I had so I decided to go until I had enough to bind of. With what I had left, it created a gentle curve, but if you had a lot much yarn, it would eventually come to a point.
  14. From now on, until you run out of yarn, you will bind off (1) one stitch at the beginning and end of each row while adding a lock or two each time. Your method may be different than mine, but I simply K2Tog (knit two together) on the knit rows, and P2Tog (purl two together) on the purl rows.The more locks you add, the fluffier it'll be, but it will also be harder to knit. Find what's comfortable for you. 
  15. Keep up this pattern until you have just enough yarn to bind off. (I made another 15 rounds before needing to bind off.) Bind off remainder stitches as mentioned in number 12 above. 
  16. Weave in any ends.
The finished product should have a nice gentle asymmetrical curve from the thinner part to the bottom. This gives you flexibility on wearing it.

If you like this or any other DIY tutorials, feel free to donate directly to me using the link below. I truly appreciate anything you can offer to keep me creating. 


Monday, July 29, 2013

Fiber Christmas in July 2013

Oh, what a weekend! As one of the organizers behind Fiber Christmas, I take much pride in offering small fiber businesses a place to come together once a year in a relaxed and supportive environment. Our goal is to connect those who have a fashion for fibers arts whether that be knitting and crochet, spinning and weaving, or even felting. Though each is its own category, there is an invisible connection between them all in which techniques can cross genres. For example, knitters can use certain crochet techniques to finish the edges of objects, or a weaver can change the look of a woven fabric by understanding the bias of the active twist of a yarn when woven.

The being said, many times a person does not realize that these techniques and tools can be intermixed. This is where a fiber festival like Fiber Christmas steps in. It brings together the different types of fiber arts to share knowledge, tools, and supplies in one location. The joyous part of Fiber Christmas is that the vendors are like a family. We each have our own strengths and weaknesses and will gladly point you in the right direction when you're looking for something specific. By supporting each other, we can a strong and active community filled with continued growth and respect.

So, what does that mean for those who visit? They become incorporated in our fiber family. They learn through exposure to some of the best artists we can bring in. They are able to purchase things they would normally never see in person. With this added value, I see returning friends year after year with new and exciting projects and ideas that expand our ideas.

Some photo highlights for you all.


Wednesday, February 9, 2011

Oklahoma Blizzard 2011 Knitting

It's actually been a pretty mild winter until this last week and a half. My little town has been frozen over several times with layers and layers of sleet, snow, and ice. Unlike previous years, we haven't lost electricity or trees due to the weight of the snow. I count us lucky.

So, in all the time we've been stuck at home, we all have been passing around colds. Stuffy noses, low grade temps, and general yuckiness. No fun. So, here we are, cold, locked inside, and not feeling well. What better time to attack those works in progress!

This corset top by Annie Modesitt has been on my mind for quite some time. Last year, for Tour de fleece, I actually hand spun the yarn to complete it. The yarn suggested is a pure Regal silk that comes at a hefty $24 a hank, far beyond my means. I had purchased some gorgeous and soft Bamboo/superwash Merino wool previously that I hadn't used. It was perfect for this: soft, shiny, and with good weight. I spun the yarn into a worsted weight single and put in in the yarn cabinet where it didn't see the light of day for six months.

Fast forward to January. . . 

After many months of sitting on it, I finally pulled out the pattern and wound the yarns into balls to attempt the pattern. I looked online in the threads on Ravelry for any hints and tips concerning the pattern. There were several such as it tends to be smaller than indicated and to make sure you gauge it.


I did however mess up in the initial lace pattern. Instead of doing a reverse stockinette, I accidentally did regular stockinette which made the edges curls away from my shoulders. I'm not one to rip out, especially that far into the project, so in the end, I just crocheted along the edge to stabilize it. You wouldn't know that is not the way it's suppose to look unless I told you. I was surprised by how quickly I knit it up with all the ribbing, lace, and cables. The finished top is stunning!


The next project that I hadn't worked on in a long time was my Peacock Feathers Shawl by Dorothy Siemen. I had originally spun the yarn for this beauty in 2009 out of a beautiful sapphire wool/mohair blend. I began knitting it in October 2009. I knit on it off and on for months before realizing that I didn't spin enough to finish it. Disheartened, I actually stuffed it in the back of the yarn cabinet. There it sat for months again. (See a pattern here?) Once again, after finishing the corset top, I found myself pulling out the shawl to try and finish. Since I couldn't complete the pattern in it's entirety, I finished as much as I could and substituted the original edge for a feather and fan pattern interlaced with bronze/copper beads to make the blue pop! I know it's hard to see in the photos, but all 1400 beads are there. Yes, I counted as I was stringing them on.


I really love this shawl and have worn it everyday since finishing it. It's not too hot, nor cold; big enough to wrap around myself entirely. It's the most stunning shawl I've knit to date. 


One of the last things I've been working on are a pair of mittens for my 6 year old son. We had gone outside when it wasn't so windy to attempt to build a snowman, failing miserable. I had on a pair of mittens that I had made recently. I noticed just how well they kept my hands warms and dry. My boys, however, had the cheap $1 acrylic gloves from Walmart. Safe to say, they didn't handle the snow as well with their little fingers getting soaked and turning blue. Right then, I told myself I was going to knit them all a pair.

Once we got back inside, I pulled out some of the first yarn I ever spun and started chugging away using a very basic pattern. He actually came over at one point sadly saying, "They're white." I laughed at his tone. I know he wouldn't want white gloves, but I had this planned out you see. I told him that yes they are white now, but when I'm done knitting them, we can dye them whatever color he wants. That immediately perked him up and he went skipping away, only to return every so often to see how far along I've gotten. He's too cute. I'm almost done, but I still have the thumb and decrease on the top of the mitten to go.


So, here we are again. Snowed in. Cold. Must finish this Classic pair of mittens, so I may start the next for my little girl. I have the perfect handspun for it. I just need to finished these.

Stay warm everyone!

Friday, January 21, 2011

Roc Day 2011


Per Wikipedia:
Distaff Day, also called Roc Day, is 7 January, the day after the feast of the Epiphany. It is also known as Saint Distaff's Day, since it was not really a holiday at all. In many European cultural traditions, women resumed their household work after the twelve days of Christmas. The distaff, or rock, used in spinning was the medieval symbol of women's work. Often the men and women would play pranks on each other during this day, as was written by Robert Herrick in his poem "Saint Distaffs day, or the Morrow After Twelfth Day" which appears in his Hesperides.
Some modern craft groups have taken up the celebration of Distaff day as part of their new year celebrations.
This is the second year I've celebrated Roc Day. This year, on a whim, I was talking with some of my spinning friends on Moonwood Farms Ravelry group about Roc Day, and we all decided it would be fun to exchange different fibers to spin for Roc Day. Little did I know it would blow up into a full-fledged spinning dance with fibers ranging from wolf, bison, possum, and lint!

I decided to use my samples as a study of fibers. I divided them into three groups: natural, fun, and colored. I know, not that scientific, huh?

WARNING: If you are allergic to any animal, do not touch this if you see it in public!


Group One:


First, I took all the natural animal/processed fiber and lined them up by texture. I kept like-textures together (bamboo/silk/corn, wool/bison/alpaca), then mixed up the colors so that similar colors wouldn't be next together. I spun these into a dk-worsted weight single. It was interesting going from one fiber to another. Many of the fibers I had spun previously and knew what to expect. So, let me hit the unusual ones.

I was pleasantly surprised by how soft the yak down way, though it's staple length was very short. It was almost like spinning cotton, but a little easier.


The Swaledale, Merino, Possum didn't really catch my eye when spinning, besides the guard hairs were prominent. Upon knitting them however, I found it to feel and look just like new household carpets. After looking up the Swaledale sheep, I found out that their wool is indeed used for carpet making.

The hank came out looking pretty unassuming as you can see. That's the beauty of something like this, it's when it's knit up that the true beauty id shown. I grabbed a set of 9 and went at knitting up a simple triangular shawl. Nothing fancy because I wanted to fiber to be the showcase, not the pattern.


I actually used some creative stitch markers I had swapped from Winemakerssister.etsy.com. As you probably know, I have a thing for steampunk and these beauties pulled at me to take them. A knitter can never have too many stitch markers!


The fibers include (from top to bottom):
Ingeo (corn)
Tibetian Yak Down
Dark Grey Carbonized Bamboo
Dark Brown Bison
Swalesdale/Merino/Possum
Creamy Tan Camel/Tussah Silk
White Cotswold
Llama
White Angora Rabbit
Black/White Shetland
White Shetland
Brown & Blue Alpaca/Cat
Haucya Alpaca
Alpaca & Wool
Wool/Angora/Bovin
Grey Wensleydale
White Wolf
Grey European Karakul
And finally White/Cream French Angora from my own rabbits


Thursday, March 18, 2010

Coffee and Tea Dyeing Sock Yarn

Today was a successful experiment in dyeing naturally using tea and coffee. I have a lot of different types of teas. Yes, I love tea, but there is now way that I could drink all that I own. I had heard of coffee dyeing before and had wanted to try it. Lots of people have dyed successfully using coffee. So why not give it a try?

I had heard before that tea actually stains your teeth worse than coffee. I thought if this were true, it would make a great dye as well. With my unlimited supply of different varieties, I grabbed a couple of bags and went at it using this BLOG POST as a guide to get me started.

I used 10% WOG alum and 5% cream of tarter for each yarn that was soaked in bottled water. (The water here in town is very hard and I didn't want any surprises from it.) After squeezing all the water out, I put them into my tea and coffee solutions to set in my oven at 170 degrees for an hour. Then, after a thorough rinsing, I placed them outside to dry. They aren't very dark, but that's okay. I love the colors. Oh, and let me add it took a lot less tea to dye the yarn than coffee. I used 4 tea bags for 2 hanks versus 4 cups for 3 hanks.


The first photo is coffee and the second is my tea brew experiment. I personally love the tea version. It looks like a granny apple to me. I plan to explore more varieties of tea and see what happens. So stay tuned!

Thursday, February 18, 2010

Corespinning Ribbons and Threads

Many people ask me, how did I learn to spin so well. Truthfully, I've been lucky and unfortunate enough to not have classes available to me, either because I can't afford them or they are within a reasonable distance. Unfortunate, obviously, because there was no one to show me the baby steps when it comes to spinning. Lucky, because I have not been influenced by the way someone spins. I am purely self taught, and have evolved my own way to spinning.

So, when it came to core-spinning, I loved the idea of wrapping fiber around something to give it a unique look that you can't do with traditional drawing. For me, I get more bang for my buck because I can use less fiber to get a lot of yardage.
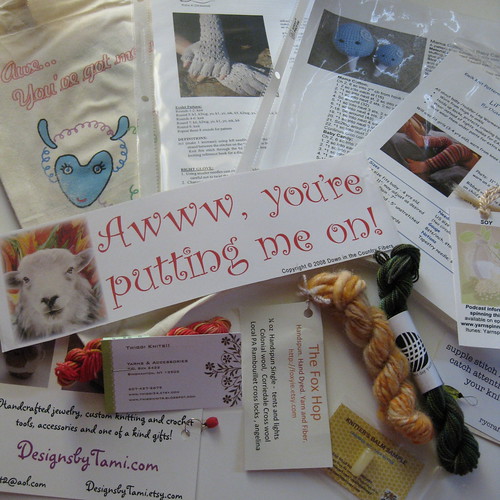
I recently received a swap package from a friend on Ravelry with big pieces of tinsel in it. Tinsel like what comes off the 1970's Christmas tree. I've spun ribbon and smaller Angelina into fiber before, so it wasn't anything new. I soon realized that the way I spin it in is different than the techniques I've seen others use.

My method in the most simplest words is
1. insert
2. cover
3. flip
4. wrap
5. cover

Better yet, here's a video of how it works.


A larger video can be found on my YouTube at http://www.youtube.com/user/DawningDreams.

Saturday, August 22, 2009

August Phat Fiber

Meet Me at the Fair!

This months Phat Fiber box was most definitely one of the best months so far. It was full of many types of fibers in bright, glorious colors to spin. Some were art batts full of lumps and bumps that gave the resulting yarn more texture. Some fibers were silky smooth that perfectly held the locks in place.


I know some spinner's don't like rough textures, and when I'm spinning a lace, I don't want a lot of texture either. Every once in a while, though, I have to spin something crazy and fun to break the monotony.

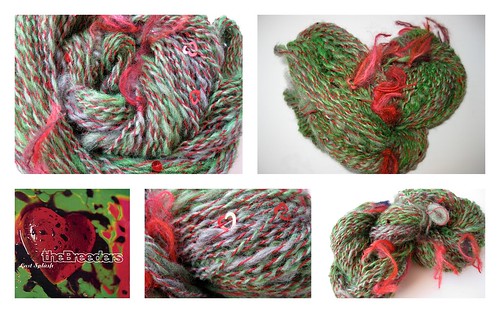
With all these fibers, I spun a fun single interlaced with locks. I used mostly materials from the box with the addition of some locks I had stashed. I can't help but smile when I see it.


Wednesday, July 29, 2009

Tour De Fleece Finish Line

Well, it's all over! How did you all do? I didn't do too much crazy outlandish yarns. I mainly worked on lace weight for a shawl I want to create.

It's funny how I can spin 175 yard of a worsted in 2 hours, but it takes 24 total hours to spin 1200 yards of lace. I don't think people realize just how much more time goes into the finer yarns when you compare the two side by side, which is mainly the reason you don't see a whole lot of handspun lace on Etsy or Artfire. It just is too costly to sell, and no one will buy it. Sad, but true.

So, to tally it up, I have:
Here's the end of a wonderful spinning month.
Art Yarn for BKG (176 yards)


Finally Finishing lace (344 yards)


And finally my peacock shawl lace (~1200 yards singles)

Wednesday, July 30, 2008

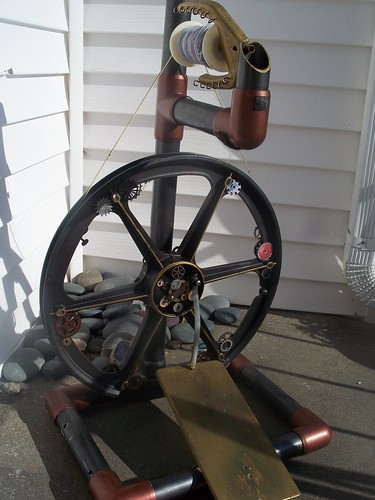
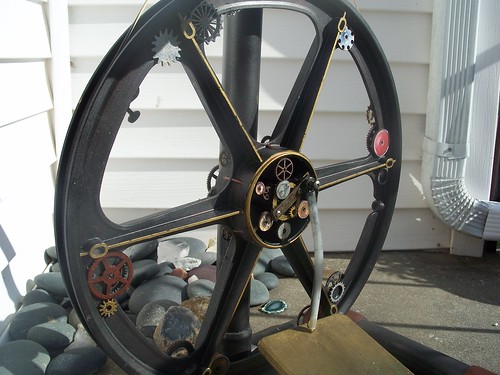
Adventures in Steampunk Spinning (Painting My Wheel)

UPDATED-


After spinning my first skein of yarn on my new Babe's Spinning Wheel, I realized that the white PVC pipe "look" would simply not do. So I headed down to my local store to pick up some paint supplies to customize it. I got copper, gold, and bronze acrylic paint, along with metallic gun metal and black spray paint for plastics, and a satin top coat.


After roughing up the surface with sandpaper, I coated the whole thing in black. Then I sprayed the gun metal color. After that dried, I highlighted the joints with the copper acrylic on the joints and gold highlights throughout.


I contemplated staining the foot pedal and flyer, but I can't to afford all those supplies. So, I painted them in the bronze/gold acrylic paints, which came out beautifully. It's very steampunk inspired, and yet it matches my other house accessories wonderfully. It's now not an eye sore in the living room, and I love it!


UPDATED 6/20/2009
I got some gears from an Etsy store and glued them on. They are so cool!

Sunday, July 27, 2008

Fiber Christmas in July Festival


I had the pleasure of attending the Fiber Christmas in July Festival in Kellyville, OK! My Mil picked me up and we headed out together Saturday and arrived at the Fairgrounds around 12:30. Since it was only the second time they have had it, it wasn't very large, but about what I expected. The first thing I noticed when I walked in was all the spinning wheels everywhere! So salivating, I started walking around the booths. The first booth was manned by two delightful women selling roving and spinning material. They were very helpful in deciding what to buy without being pushy or know-it-all. You can find some of their stash at Weavery at Indian Meridian.


Then we looked around at the other booths. We found the woman who raises Alpacas in Oklahoma that we had seen at L&B Yarn Co last year who was selling more roving and yarn. She had more variety this year that was fun to see. I believe her website is Kindred Spirits.

There were also many non yarn booths which included baskets and odds and ends that were very interesting. We happened by the above doll at on of those booths. He reminded me of Carrot Top in a tuxedo. I also ran into Dark Twist from whom I purchased my Top Hat pattern from. Though I didn't realize it was her until I got home. It's always fun to meet the person behind the online persona.


And by the end of the day, a woman at one booth informed us of a spinning wheel that was for sell at a great price! I was so excited, but tried not to get my hopes too high. Naturally, one of the wooden beauties would be the epitome of a spinners dream, but I just wanted something to start with. So we got me a spinning wheel for $110 dollars plus some bobbins! I know it's not the prettiest thing, but I hope to rectify that by painting it. I tried spinning some when I got how and did fairly well considering I had never touched a spinning wheel in my life!

So our haul in the end was 6 skeins of yarn, 4 different types of roving to experiment with, a great spinning wheel, and a Niddy Noddy. But most of all, I had a great time meeting people, talking, and hanging out with my Mil.